The Internal Anatomy
Steps:
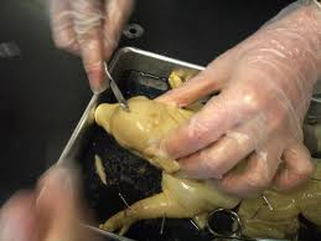
12. Pry open the mouth with a probe. Using scissors, cut through the joint between the upper and lower jaws to aid in your observations.
12. Pry open the mouth with a probe. Using scissors, cut through the joint between the upper and lower jaws to aid in your observations.
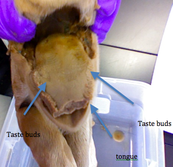
13. In the oral, or mouth, cavity find the tongue. The teeth have usually not erupted.
14. Locate the pharynx, the mouth cavity that begins at the jaw hinges and
extends to the esophagus. In the pharynx, try to locate the glottis (the
opening to the trachea) and the Eustachian tubes, which extend from the pharynx
to the middle ear. Then locate the esophagus in the back of the
pharynx.
extends to the esophagus. In the pharynx, try to locate the glottis (the
opening to the trachea) and the Eustachian tubes, which extend from the pharynx
to the middle ear. Then locate the esophagus in the back of the
pharynx.
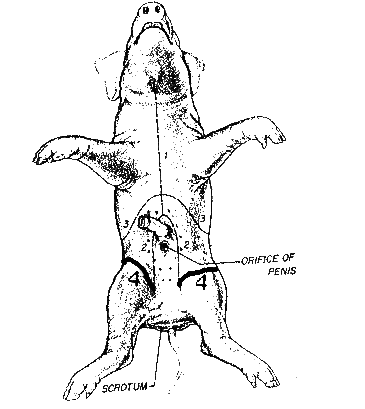
15. Follow the diagram to the left, whic shows where to make the incisions.
Cut open the chest by following incision number
With foreceps lift the thick skin and tissue that you are about to cut, starting at the belly. Make a small slit with your scalpel, then use scissors to extend the cut, up incision 1 until you reach the pig's chin.
CAUTION: The initial cut may cause perservitive to splash out.
Be careful when cutting the neck area and avoid distubing any glands. You will be cutting through the muscle. IT IS BETTER TO CUT TWICE THAN DAMAGE THE ORGANS beneath the muscle with one deep cut.
16. Make incisions along lines 2, and 3. Follow line 4 to cut around the umbilical cord and fold back the skin flaps. Be careful not to cut the umbilical cord.
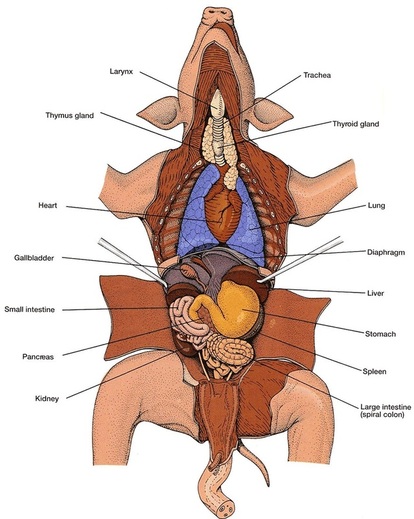
17. Using the diagrams below and to the left as a guide. Identify the liver (the largest organ), and look for a vein (the umbilical vein) that runs from the liver to the umbilical cord.
Cut the umbilical vein with scissors.
Be careful not to cut any other organs when cutting the umbilical vein.
Note: The skin can be held back with dissecting pins.
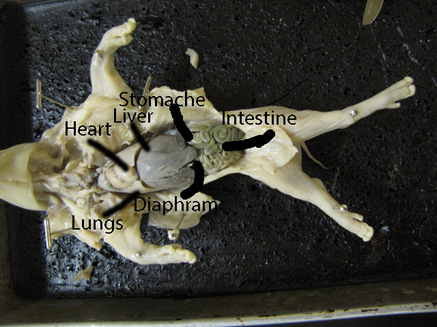
18. Using the diagrams below and to the left as a guide, identify: the lungs, heart, stomach, intestine, and diaphragm.
Cut the umbilical vein with scissors.
Be careful not to cut any other organs when cutting the umbilical vein.
Note: The skin can be held back with dissecting pins.
18. Using the diagrams below and to the left as a guide, identify: the lungs, heart, stomach, intestine, and diaphragm.
19. Using a blunt probe locate as many digestive organs as possible. As you do
so, observe the organs that are supported by a membrane, the mesentery.
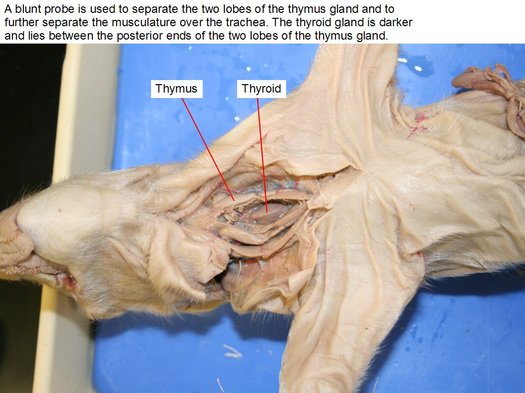
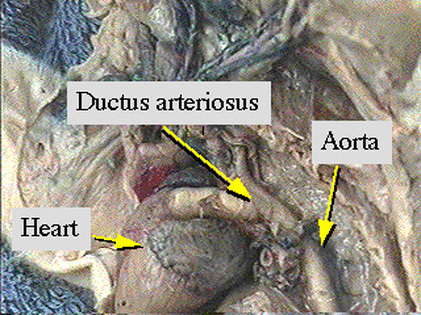
20. Raise the thalamus gland, which covers the heart. You may be able to locate the
ductus arterious.
so, observe the organs that are supported by a membrane, the mesentery.
20. Raise the thalamus gland, which covers the heart. You may be able to locate the
ductus arterious.
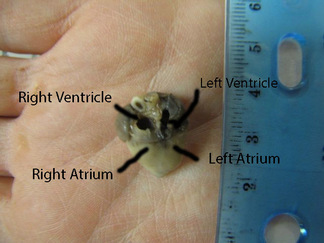
21. Cut the heart in half vertically with scissors. Locate the atria and ventricles.
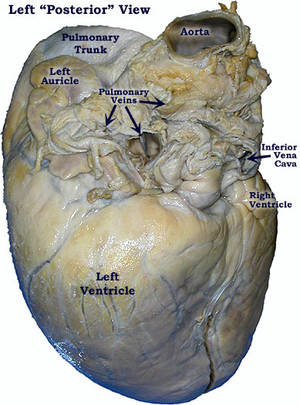
22. Locate as many arteries and veins as possible. Refer to the diagram below and to the left to help you identify them. In your specimen, the arteries may be injected with red latex. If so, the veins will be injected with red latex.
22. Locate as many arteries and veins as possible. Refer to the diagram below and to the left to help you identify them. In your specimen, the arteries may be injected with red latex. If so, the veins will be injected with red latex.
23. To observe the remaining organs, carefully use scissores and foreceps to remove the organs studies perviously. BE CAREFULL NOT TO CUT OR DAMAGE ANY ORGANS.
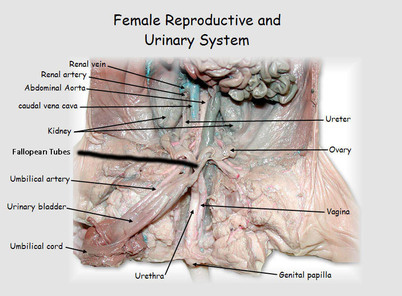
24. Using the diagram to the left. Identify two bean-shaped kidneys the dorsal wall in the mid- to lower-back region. The light-coloured strip of tissue at the top of each kidney is an adrenal gland.
25. Identify the ureters, which carry urine from the kidneys to the urinary bladder. Find the urinary bladder within the umbillical cord.
26. Using a probe or dissection needle, carefully explore the structure of the reproductive system. Locate the small, paired, bean-shaped yellow (or dark brown) ovaries just posterior to the kidneys. Then locate the Fallopian tubes, which will conduct eggs from the ovaries to the uterus.
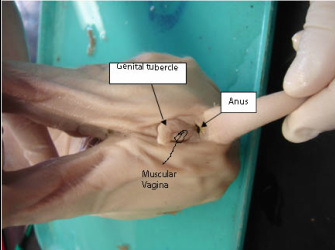
27. Locate the uterus, and observe the two uterine horns. Extending from the lower uterine section. Then locate the muscular vagina. Which is continuous with the uterus. Also locate the genital tubercle, a fleshy structure that projects from the urogenital opening.
28. Rotate the pig so that it is skull up. Using scissors, cut away the skin on the head to explore the skull. The bone is not yet completely calcified, and the skull is largely cartilagious. Using scissors, carefully cut a disk out of the top of the skull. Remove the disk that you cut.
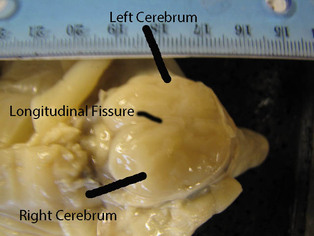
29. You have revealed the two hemispheres of the cerebrum. Find the longitudinal fissure of the two hemispheres.
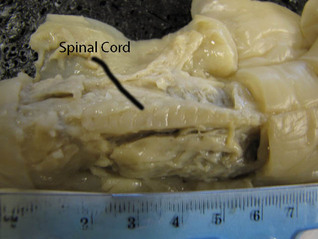
30. With forceps and a scapel, remove the muscle from the mid-dorsal line of the back of the body in a strip about 1 1/2 inches long and 1/2 inch wide. Use the scalpel to make a series of "slices" through the vertebrae to expose the thick, whitish spinal cord.
31. When you have completed your dissection, remove the specimen from the dissecting tray. Dispose of your materials according to the directions from your teacher.
32. Clean up work area and wash your hands before leaving the lab.
32. Clean up work area and wash your hands before leaving the lab.
